tuned wrote:Even at 20 below.
Al the Mirthmaker (Mark III)
Moderators: Redneck_Randy, badmoonrising, lakerunner
-
badmoonrising

- Site Admin
- Posts: 10066
- Joined: Fri Mar 30, 2007 7:04 pm
- Location: Chesapeake City, Maryland
Re: Al the Mirthmaker (Mark III)
Ed, Cheryl, Ethan and Aspen.
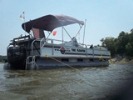
2013 Sun Tracker Party Barge 22 w/90 HP Mercury, "Hellrhighwater 2"
2014 E-350 Extended XLT.
Chesapeake City ,MD
2013 Sun Tracker Party Barge 22 w/90 HP Mercury, "Hellrhighwater 2"
2014 E-350 Extended XLT.
Chesapeake City ,MD
-
curtiscapk
- Posts: 5445
- Joined: Mon Nov 10, 2008 8:31 am
- Location: OP KS\Hillsdale Lake
Re: Al the Mirthmaker (Mark III)
Awesome stuff Todd!
Craig and Paula
"THE FLOATER" rebuild Spring 2013
viewtopic.php?f=2&t=15328
94 Party Barge 24' 115 merc
Turning Point hustler 14 x 13 prop
22mph gps 3 people
12 F150
Overland Park Ks
Hillsdale Lake, KS
"THE FLOATER" rebuild Spring 2013
viewtopic.php?f=2&t=15328
94 Party Barge 24' 115 merc
Turning Point hustler 14 x 13 prop
22mph gps 3 people
12 F150
Overland Park Ks
Hillsdale Lake, KS
Re: Al the Mirthmaker (Mark III)
You da man.... dude. 
Rascal
Rascal
Fishing Year Round SW Florida
Gulf Coast & Pine Island Sound
Premier 22' 2012 Cast A Way
115 hp Honda, 15.5 x 13 prop
Sea Star Power Steering
Day Enclosure
Loan Star Anchor Winch
Fixed Mount ipad Air for
Navigation & Satellite Weather
Gulf Coast & Pine Island Sound
Premier 22' 2012 Cast A Way
115 hp Honda, 15.5 x 13 prop
Sea Star Power Steering
Day Enclosure
Loan Star Anchor Winch
Fixed Mount ipad Air for
Navigation & Satellite Weather
Re: Al the Mirthmaker (Mark III)
Even MORE crap I built enroute to this winter's boat mods:
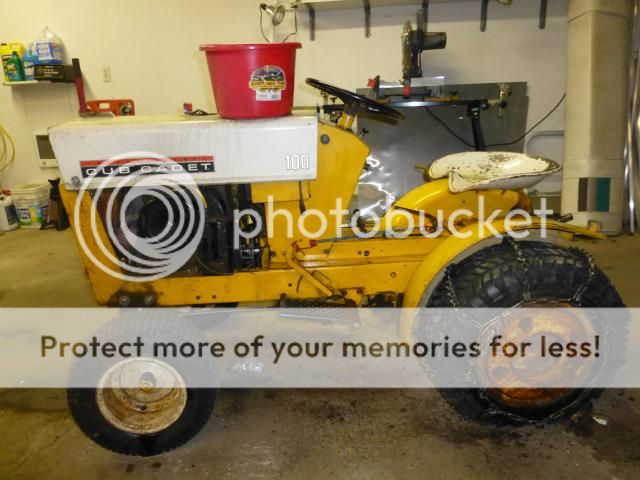
My Cub Cadet '50 year rebuild' really shouldn't qualify for the boat thread except that it was in my way. Plus it is pretty cool. It's a 1962 Model 100.
Over the course of the fall and into this winter, I did the drive clutch, pto clutch, full engine, carb, and full mower deck rebuild.
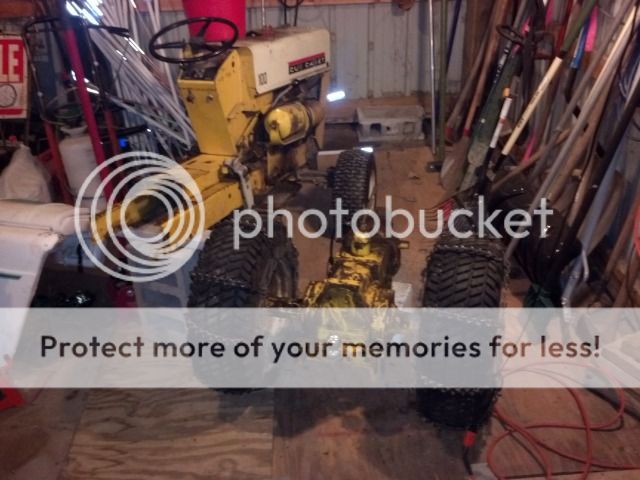
Oh yeah, the air cleaner needed a little attention too
She is now cleaner than it's been in the 25 years that I've owned her. I have eight attachments for it as well.
My Cub Cadet '50 year rebuild' really shouldn't qualify for the boat thread except that it was in my way. Plus it is pretty cool. It's a 1962 Model 100.
Over the course of the fall and into this winter, I did the drive clutch, pto clutch, full engine, carb, and full mower deck rebuild.

Oh yeah, the air cleaner needed a little attention too

She is now cleaner than it's been in the 25 years that I've owned her. I have eight attachments for it as well.

ToddBob
'Al the Mirthmaker' (The Third)
Build-- viewtopic.php?f=16&t=14007
Rainy Lake/Voyageurs National Park
International Falls, MN
'Al the Mirthmaker' (The Third)
Build-- viewtopic.php?f=16&t=14007
Rainy Lake/Voyageurs National Park
International Falls, MN
Re: Al the Mirthmaker (Mark III)
OK, time to fill some of those holes.
The fuel tank turned into a pretty big project, but I'm glad I did it. My original installation sucked. The fill hose was quite long with a partial loop so that I could lift the lid above the tank (which the fill fitting was installed in). I couldn't hardly use the fill last year for the gas spitting back at me. I got by with my auxiliary tank and transfered fuel from it down to my main.
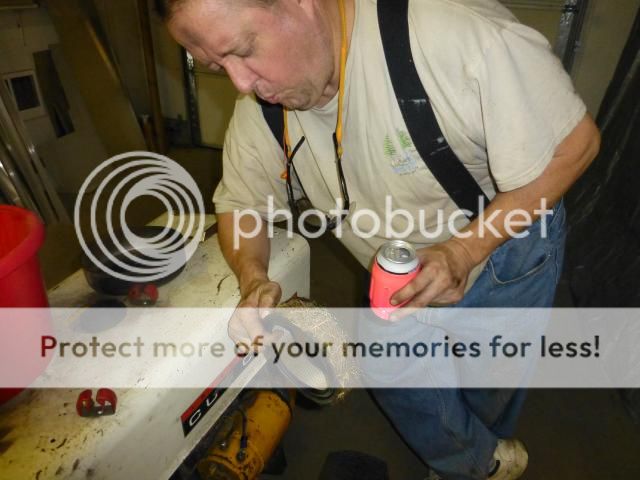
This first shot shows several mods. An access hatch for easier inspection. The fuel pump has a lengthened bracket, 2 hoses, wiring. Also is my air pump for the exhaust cutouts. Hardin Marine doesn't do very good engineering-long story but I fixed several problems with it.
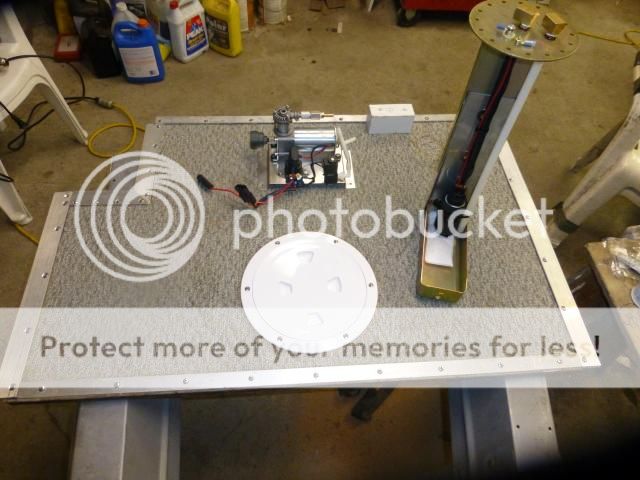
Beginning the install of the fuel pump. Scary working IN a used fuel tank. I took major safety precautions including using my bilge blower to evacuate the tank for a day (after a dry wipe with non static cloth). Then borrowed a fume sniffer to make sure. Grounded myself as well when I began work.

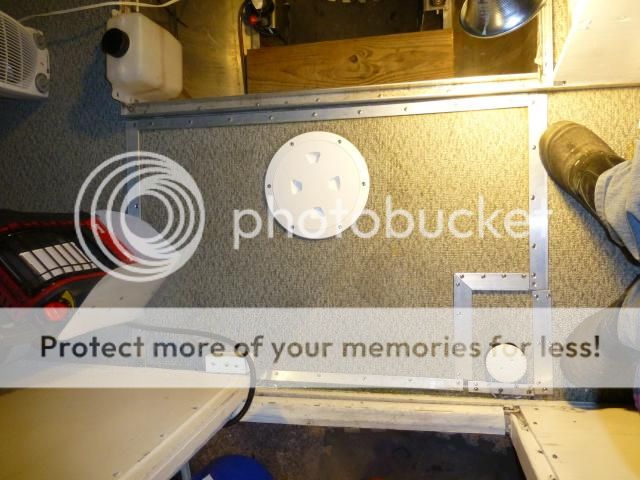
Note the fuel fill hose is now separate from the main lid. It is about a third the length of my original design and should work fine now. Fuel pump is in. Also note that I am wearing Paks...ahem

Done. And I didn't even blow myself up!
The fuel tank turned into a pretty big project, but I'm glad I did it. My original installation sucked. The fill hose was quite long with a partial loop so that I could lift the lid above the tank (which the fill fitting was installed in). I couldn't hardly use the fill last year for the gas spitting back at me. I got by with my auxiliary tank and transfered fuel from it down to my main.
This first shot shows several mods. An access hatch for easier inspection. The fuel pump has a lengthened bracket, 2 hoses, wiring. Also is my air pump for the exhaust cutouts. Hardin Marine doesn't do very good engineering-long story but I fixed several problems with it.

Beginning the install of the fuel pump. Scary working IN a used fuel tank. I took major safety precautions including using my bilge blower to evacuate the tank for a day (after a dry wipe with non static cloth). Then borrowed a fume sniffer to make sure. Grounded myself as well when I began work.

Note the fuel fill hose is now separate from the main lid. It is about a third the length of my original design and should work fine now. Fuel pump is in. Also note that I am wearing Paks...ahem

Done. And I didn't even blow myself up!

ToddBob
'Al the Mirthmaker' (The Third)
Build-- viewtopic.php?f=16&t=14007
Rainy Lake/Voyageurs National Park
International Falls, MN
'Al the Mirthmaker' (The Third)
Build-- viewtopic.php?f=16&t=14007
Rainy Lake/Voyageurs National Park
International Falls, MN
-
curtiscapk
- Posts: 5445
- Joined: Mon Nov 10, 2008 8:31 am
- Location: OP KS\Hillsdale Lake
Re: Al the Mirthmaker (Mark III)
Todd sir you are a magic man! 
Craig and Paula
"THE FLOATER" rebuild Spring 2013
viewtopic.php?f=2&t=15328
94 Party Barge 24' 115 merc
Turning Point hustler 14 x 13 prop
22mph gps 3 people
12 F150
Overland Park Ks
Hillsdale Lake, KS
"THE FLOATER" rebuild Spring 2013
viewtopic.php?f=2&t=15328
94 Party Barge 24' 115 merc
Turning Point hustler 14 x 13 prop
22mph gps 3 people
12 F150
Overland Park Ks
Hillsdale Lake, KS
Re: Al the Mirthmaker (Mark III)
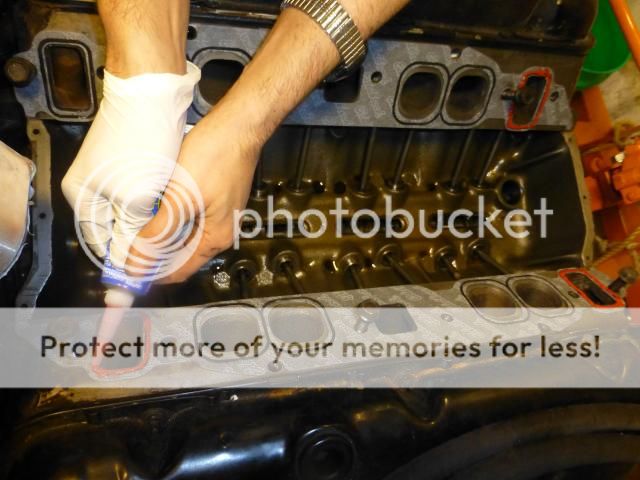
The FUN stuff is beginning.
Out with the old
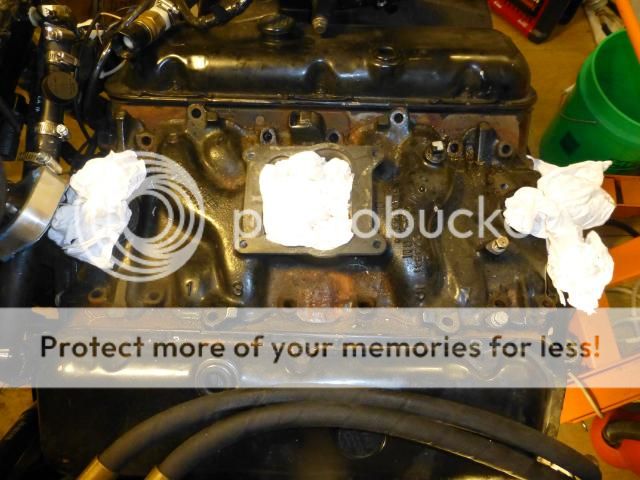
Some careful cleaning
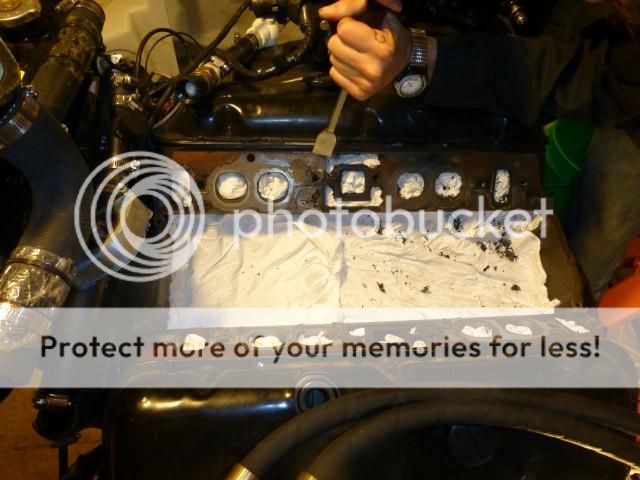
A dab of glue
Et Viola! New multiport manifold by Edelbrock. At twenty below.
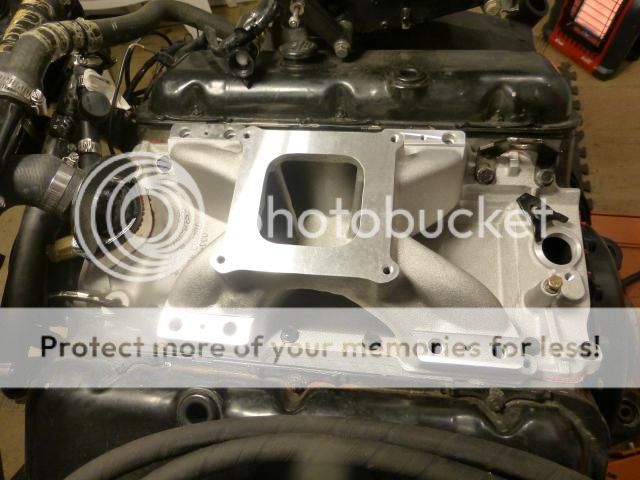
Anybody have need of a Big Block intake and Rochester Quadrajunk er Jet? Still running fine at take-off. Never been sunk
It is now Christmas every day at my house. Lots of shiny little bits are arriving in dull brown little boxes. I need to tip my UPS guy.
Out with the old

Some careful cleaning

A dab of glue

Et Viola! New multiport manifold by Edelbrock. At twenty below.

Anybody have need of a Big Block intake and Rochester Quadrajunk er Jet? Still running fine at take-off. Never been sunk
It is now Christmas every day at my house. Lots of shiny little bits are arriving in dull brown little boxes. I need to tip my UPS guy.
ToddBob
'Al the Mirthmaker' (The Third)
Build-- viewtopic.php?f=16&t=14007
Rainy Lake/Voyageurs National Park
International Falls, MN
'Al the Mirthmaker' (The Third)
Build-- viewtopic.php?f=16&t=14007
Rainy Lake/Voyageurs National Park
International Falls, MN
Re: Al the Mirthmaker (Mark III)
very nice!!
My Happy place is on a boat at the lake with my kids!!
current boats:
1983 chaparral 235 XLC (restoration)
1977 playcraft p24 pontoon (parents own now I am the mechanic)
1975 skeeter hawk (on hold)
past boats:
this list will not fit!
current boats:
1983 chaparral 235 XLC (restoration)
1977 playcraft p24 pontoon (parents own now I am the mechanic)
1975 skeeter hawk (on hold)
past boats:
this list will not fit!
-
curtiscapk
- Posts: 5445
- Joined: Mon Nov 10, 2008 8:31 am
- Location: OP KS\Hillsdale Lake
Re: Al the Mirthmaker (Mark III)
JEEZUS H! Those ports will dumb the fuel!!!!!!! 

Craig and Paula
"THE FLOATER" rebuild Spring 2013
viewtopic.php?f=2&t=15328
94 Party Barge 24' 115 merc
Turning Point hustler 14 x 13 prop
22mph gps 3 people
12 F150
Overland Park Ks
Hillsdale Lake, KS
"THE FLOATER" rebuild Spring 2013
viewtopic.php?f=2&t=15328
94 Party Barge 24' 115 merc
Turning Point hustler 14 x 13 prop
22mph gps 3 people
12 F150
Overland Park Ks
Hillsdale Lake, KS
-
pond tuuunes
- Posts: 496
- Joined: Sun Jun 13, 2010 2:27 pm
Re: Al the Mirthmaker (Mark III)
I thought Al was going to be injected? But yea, very nice! JT
2002 playcraft extreme,26', I/O, 498 ci, 625 hp, 580 ft pounds of torgue, Dart alluminum heads, holly 850 carb, bravo XR drive. GPS 76 mph.
Re: Al the Mirthmaker (Mark III)
Hellz yeah it's gonna be injected! Multiport. If you look closely, there's 4 little holes on each side where the injectors go. All parts are now here. 10 days off starting tomorrow. Build begins in earnest....ummm....in between holiday partiespond tuuunes wrote:I thought Al was going to be injected? But yea, very nice! JT
Weather looks good for it--Highs for the next week are forecast to range from a balmy 10 friggin degrees at best. Lows to 30 below!
Better get me an extra twenty pounder (propane) or two for the motor room. Gonna take my time on this one as I am swimming in uncharted waters
Aaand yes Craig, those ports will most certainly make the fuel dumb
ToddBob
'Al the Mirthmaker' (The Third)
Build-- viewtopic.php?f=16&t=14007
Rainy Lake/Voyageurs National Park
International Falls, MN
'Al the Mirthmaker' (The Third)
Build-- viewtopic.php?f=16&t=14007
Rainy Lake/Voyageurs National Park
International Falls, MN
-
pond tuuunes
- Posts: 496
- Joined: Sun Jun 13, 2010 2:27 pm
Re: Al the Mirthmaker (Mark III)
Next year a pro charger?
2002 playcraft extreme,26', I/O, 498 ci, 625 hp, 580 ft pounds of torgue, Dart alluminum heads, holly 850 carb, bravo XR drive. GPS 76 mph.
Re: Al the Mirthmaker (Mark III)
Nitro-Methane. My ECU is supposed to have the capability to control any of that crap. The mind boggles. Especially if its cold enough. I seem to do my best work then
ToddBob
'Al the Mirthmaker' (The Third)
Build-- viewtopic.php?f=16&t=14007
Rainy Lake/Voyageurs National Park
International Falls, MN
'Al the Mirthmaker' (The Third)
Build-- viewtopic.php?f=16&t=14007
Rainy Lake/Voyageurs National Park
International Falls, MN
Re: Al the Mirthmaker (Mark III)
Wow.....
Ferg's Tritoon Build
[url]http://www.pontoonforums.com/viewtopic.php?f=16&t=17012[/url]
[url]http://www.pontoonforums.com/viewtopic.php?f=16&t=17012[/url]
Re: Al the Mirthmaker (Mark III)
Within the next few days, I will begin assembling my own stainless braided fuel hoses using cute little red and blue aluminum AN fittings. As they will be in an enclosed motor area and I am EXTREMELY safety conscious, I did a tremendous amount of research on the subject. For those of you uninterested in this long and rather boring read, hit your back button NOW. Otherwise, here is what I learned:
AN stands for Army/Navy and has been around for many decades. In the last twenty years or so, it really caught on with the muscle car and restoration guys as they look so nice. They are not just pretty tho. The fittings are typically rated for 3000PSI or more and are used heavily in the Aerospace industry. Modern hoses are typically lined on the inside with fancy stuff that allows them to carry just about anything, hydraulic fluid, oxygen, water, straight ethanol (E85), nitrous and oh yeah, gasoline.
Hoses can have stainless or nylon outer braid or be just plain rubber or synthetic.
Sizing seems to be one of the big confusion points, as all sizes are determined by the hose OD rather than ID like most other types of hose fittings. The reason for this is that ANY brand fitting will work with ANY brand hose. Here is how to 'read' the sizing---all numbers refer to 1/16ths of an inch. Therefore -8AN hose is 8/16" (1/2") OD. This translates to approximately 3/8 ID hose in the normal rating system.
Fittings have faces that are flared at a specific angle and are assembled with no o-rings, sealant, tape. Just a dab of lube and they fit together so nicely that they don't even require much torque to seal extremely well. Hose ends are built by screwing an 'inside' piece into an 'outside' piece which creates a wedge in the hose and grips it (along with the stainless braid) extremely tightly. No hose clamps are required as it is 'clamped' from within, and very well at that!
One of the positives of these highly efficient and reliable hoses is that they can fairly easily be assembled by the home mechanic (reusable too). A huge negative is that the braided hose has to go very neatly inside the fitting during assembly. This isn't always easy and often results in 'bloody finger syndrome' During my research, I came across a well regarded assembly tool that makes this much easier. Brand name KoulTool. I invested in a set along with a couple of other specific tools so that I do this 100% properly.
Fittings and hoses don't come cheap. They will be around $100 to $150 by the time I am done. They should be bulletproof tho. Over a hundred bucks in assembly tools as well. I already have gearhead buddies lining up to borrow them
After visiting a number of manufacturer sites-- Jegs, Summit, Aeroquip amongst others and watching a number of vids on YouTube etc...I condensed all the info and built myself a cheat sheet to use for assembly. I love cheat sheets! Here it is:
Koul Tool Braided Stainless Hose assembly with AN fittings
1. Mark hose. Take into account thread length etc….
2. Wrap electric tape with mark centered underneath
3. Cut with snippers or fine cutoff wheel
4. Tidy hose inside and out. Blow out if needed (FROM CLEAN END)
5. Koul Tool in vice with fitting snug inside it.
6. Grease (or Vaseline) Koul Tool lightly. A little on braid too.
7. Twist hose into tool up to threads
8. Remove from tool and adjust depth (to threads) if needed
9. Mark or tape hose as reference to make sure it doesn’t pull out at all (or very little)
10. Lube threads (3-in-1 or 30Wt oil) of fittings (and inside hose)
11. Screw fitting in (about 1/16” from bottom)
12. Clean with solvent (or soapy water) and blow out as needed. Fittings must stay SPOTLESS at all times. Protect with tape, caps or bags if not assembling immediately.
13. OIL THREADS JUST PRIOR TO ASSEMBLING ON MOTOR! Do not oil any earlier as they will just gather dust.
Aeroquip torque specs
-6AN 150-195 in/lb - OR 1 to 1.5 flats past hand tight OR about a quarter turn (minus a hair)
-8AN 270-350 in/lb - OR 1.25 to 1.75 flats past hand tight OR about a quarter turn
Anyone with knowledge and experience in this area, please weigh in so that I don't go BOOM
AN stands for Army/Navy and has been around for many decades. In the last twenty years or so, it really caught on with the muscle car and restoration guys as they look so nice. They are not just pretty tho. The fittings are typically rated for 3000PSI or more and are used heavily in the Aerospace industry. Modern hoses are typically lined on the inside with fancy stuff that allows them to carry just about anything, hydraulic fluid, oxygen, water, straight ethanol (E85), nitrous and oh yeah, gasoline.
Hoses can have stainless or nylon outer braid or be just plain rubber or synthetic.
Sizing seems to be one of the big confusion points, as all sizes are determined by the hose OD rather than ID like most other types of hose fittings. The reason for this is that ANY brand fitting will work with ANY brand hose. Here is how to 'read' the sizing---all numbers refer to 1/16ths of an inch. Therefore -8AN hose is 8/16" (1/2") OD. This translates to approximately 3/8 ID hose in the normal rating system.
Fittings have faces that are flared at a specific angle and are assembled with no o-rings, sealant, tape. Just a dab of lube and they fit together so nicely that they don't even require much torque to seal extremely well. Hose ends are built by screwing an 'inside' piece into an 'outside' piece which creates a wedge in the hose and grips it (along with the stainless braid) extremely tightly. No hose clamps are required as it is 'clamped' from within, and very well at that!
One of the positives of these highly efficient and reliable hoses is that they can fairly easily be assembled by the home mechanic (reusable too). A huge negative is that the braided hose has to go very neatly inside the fitting during assembly. This isn't always easy and often results in 'bloody finger syndrome'
Fittings and hoses don't come cheap. They will be around $100 to $150 by the time I am done. They should be bulletproof tho. Over a hundred bucks in assembly tools as well. I already have gearhead buddies lining up to borrow them
After visiting a number of manufacturer sites-- Jegs, Summit, Aeroquip amongst others and watching a number of vids on YouTube etc...I condensed all the info and built myself a cheat sheet to use for assembly. I love cheat sheets! Here it is:
Koul Tool Braided Stainless Hose assembly with AN fittings
1. Mark hose. Take into account thread length etc….
2. Wrap electric tape with mark centered underneath
3. Cut with snippers or fine cutoff wheel
4. Tidy hose inside and out. Blow out if needed (FROM CLEAN END)
5. Koul Tool in vice with fitting snug inside it.
6. Grease (or Vaseline) Koul Tool lightly. A little on braid too.
7. Twist hose into tool up to threads
8. Remove from tool and adjust depth (to threads) if needed
9. Mark or tape hose as reference to make sure it doesn’t pull out at all (or very little)
10. Lube threads (3-in-1 or 30Wt oil) of fittings (and inside hose)
11. Screw fitting in (about 1/16” from bottom)
12. Clean with solvent (or soapy water) and blow out as needed. Fittings must stay SPOTLESS at all times. Protect with tape, caps or bags if not assembling immediately.
13. OIL THREADS JUST PRIOR TO ASSEMBLING ON MOTOR! Do not oil any earlier as they will just gather dust.
Aeroquip torque specs
-6AN 150-195 in/lb - OR 1 to 1.5 flats past hand tight OR about a quarter turn (minus a hair)
-8AN 270-350 in/lb - OR 1.25 to 1.75 flats past hand tight OR about a quarter turn
Anyone with knowledge and experience in this area, please weigh in so that I don't go BOOM
ToddBob
'Al the Mirthmaker' (The Third)
Build-- viewtopic.php?f=16&t=14007
Rainy Lake/Voyageurs National Park
International Falls, MN
'Al the Mirthmaker' (The Third)
Build-- viewtopic.php?f=16&t=14007
Rainy Lake/Voyageurs National Park
International Falls, MN