
some crappy cloth bonnets to be honest, I have been to about 5 stores & thats all I can find! Where can I get a good one?
Tom
Step by step toon polishing please?
Moderators: Redneck_Randy, badmoonrising, lakerunner
Re: Step by step toon polishing please?
2004 Crest XRS III 25
140hp Johnson 4 stroke
Underskinned 13.5X15 BRP al prop
29.1 mph @ 5800rpm
Lk St Clair, MI
140hp Johnson 4 stroke
Underskinned 13.5X15 BRP al prop
29.1 mph @ 5800rpm
Lk St Clair, MI
-
dockholiday
- Posts: 2916
- Joined: Thu Nov 06, 2008 7:32 pm
- Location: Lake Oconee, Ga.
Re: Step by step toon polishing please?
You don't need a lot of the mothers. Do about a 2ft area, helps get the feel if you never done it before. Get some lacquer thinner to remove the black stuff. Mineral Spirits or acetone will work but not as well. Helps to have at least two buffing pads. I cleaned them with awesome cleaner. Need at least a big roll of paper towels. My local auto zone carries some good buffing pads. I mainly use the blue ones (micro fiber). The mothers and meguiars are abrasive so one you get em looking fairly good I would go to the sharkhide or flitz for the final polishing. Poof they will look like mirrors.busatom wrote:Dock or Herb, is there a trick, Im applying mothers liberally, then using buffer to buff it, should I buff it forever or till its dry, leave it wet, then wipe it? Any other tips appreciated. Thanks
Tom
doc
Dying ain't much of living boy
http://www.youtube.com/watch?feature=pl ... gm-sp1-Nhs
http://www.youtube.com/watch?feature=pl ... gm-sp1-Nhs
Re: Step by step toon polishing please?
What Doc said worked for me. Took me a month working on it in my free time. Two cans of Mothers and a case of Coors Lite.
1984 Riviera Cruiser 28ft, rebuilt and enhanced with 175hp Evinrude
-
dockholiday
- Posts: 2916
- Joined: Thu Nov 06, 2008 7:32 pm
- Location: Lake Oconee, Ga.
Re: Step by step toon polishing please?
Yep not a quick thing to accomplish. Some 400 to 600 grit wet dry paper and or some 0000 steel wool with dawn dishwasihng liquid helps some and is cheaper than using the polish entirely.
doc
doc
Dying ain't much of living boy
http://www.youtube.com/watch?feature=pl ... gm-sp1-Nhs
http://www.youtube.com/watch?feature=pl ... gm-sp1-Nhs
Re: Step by step toon polishing please?
HI All, I found this site a few weeks ago and have been reading all the great info! We bought our first pontoon a few weeks ago and I want to polish the pontoons before it goes in the water. They look pretty clean...just dull. I love the mirror look. I have the sharkhide already and a buddy that owns a detail business so I am set on polishing equipment. My question is...do you polish the inside of the pontoons too? Also, how can I polish the bottoms if it is on a bunk trailer?
Thanks in advance for the reply!
Thanks in advance for the reply!
24' 2005 Harris
90hp Mercury
90hp Mercury
-
dockholiday
- Posts: 2916
- Joined: Thu Nov 06, 2008 7:32 pm
- Location: Lake Oconee, Ga.
Re: Step by step toon polishing please?
I just did the nose cone of the toon on both sides since that is about all you will see. Just as long as you don't have any crud on the inside that would create drag. Same for the bottoms since most toons at least one forth or more of the toon will be underwater.
doc
doc
Dying ain't much of living boy
http://www.youtube.com/watch?feature=pl ... gm-sp1-Nhs
http://www.youtube.com/watch?feature=pl ... gm-sp1-Nhs

Re: Step by step toon polishing please?
Hey Bullet ...Bullet wrote:HI All, I found this site a few weeks ago and have been reading all the great info! We bought our first pontoon a few weeks ago and I want to polish the pontoons before it goes in the water. They look pretty clean...just dull. I love the mirror look. I have the sharkhide already and a buddy that owns a detail business so I am set on polishing equipment. My question is...do you polish the inside of the pontoons too? Also, how can I polish the bottoms if it is on a bunk trailer?
Thanks in advance for the reply!
I myself would clean and polish every bit of the toon that I could get to. I would not worry about the bottoms of the toons that sit on the trailer bunks.
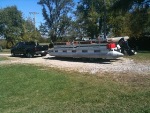
I just purchased a used 2007 Sedona, and my toons are clean, and have no growth or pitting, but they are a dull aluminum. I got a local detail guy to quote me on cleaning and polishing them to "almost a mirror" finish, and he wants 300 bucks !! I was placing an order for some other stuff on Overtons today, and after hearing $300, ordered a spray jug of Toon-Brite for $20. I have a clear photo of the toons "before" and will post an "after" picture asap.
Phil Clark
2007 Sedona L21 with a Yamaha 90hp 2 stroke on beautiful Smith Mountain Lake, VA
2007 Sedona L21 with a Yamaha 90hp 2 stroke on beautiful Smith Mountain Lake, VA
-
partybarge
- Posts: 19
- Joined: Sun May 09, 2010 7:19 pm
Re: Step by step toon polishing please?
i would def use a stiff wool pad on your first and second cut using an aggressive cut compound. after the first two steps use a foam pad for your polish and your wax. you may need to wet sand the toons first depending on how it buffs.
Re: Step by step toon polishing please?
i ve been experementing on my toons, and had found these "scrubbing" pads at homedepot that where wroking pretty good to get the crud, they are grey and are in the sandpaper department.
went to harbor freight and saw these 3" rounds that looked similar to the pad at home depot so I bought those and the matching backing pad and gave it a try with the drill, and they seem too work better.
My plan right now is to do it with the rounds, then follow with the pads lightly, then some 800 wet dry sandpaper to get everything evened out, then some cutting compound on the buffer, followed up with the sharkhide polish and that should be good.
Sounds like a lot, but the step 2 and 3 with the wet sand should go pretty quick since the roudn do a good job getting the crud off and getting rid of scratches and leaving it pretty smooth to start.
-bb

Re: Step by step toon polishing please?
You are going to want to go another step further with the wet/dry sand paper. 800 grit is still too rought for many buffers and compounds to take out. I would end at atleast 2000 grit, or 1500 if you can't find the 2000. It's much easier & cheaper & quicker to do the sanding up to the highest grit you can find, then buff less. THis uses less buffing compound and it's much quicker. PLus, sandpaper is much cheaper than a good buffing compound.blackberg wrote:My plan right now is to do it with the rounds, then follow with the pads lightly, then some 800 wet dry sandpaper to get everything evened out, then some cutting compound on the buffer, followed up with the sharkhide polish and that should be good.
Sounds like a lot, but the step 2 and 3 with the wet sand should go pretty quick since the roudn do a good job getting the crud off and getting rid of scratches and leaving it pretty smooth to start.
-bb
IMO, I would highly suggest Meguiars M105 & M205. These are made for hard clear coat cars, and work excellent on the naked aluminum toons. Both can be had for about $30 a quart, and that would do several toons and cars.
"Nauti Weasel"
2005 Beachcomber Islander 26
2005 Beachcomber Islander 26
Re: Step by step toon polishing please?
thanks for the suggestions,
I like to use 2000 grit but I can never find it locally,
Ive gone to auto paint stores and they give me a crazy look.
I tend to use Meguiars for everything and that m105 sounds good.
thanks
-bb
I like to use 2000 grit but I can never find it locally,
Ive gone to auto paint stores and they give me a crazy look.
I tend to use Meguiars for everything and that m105 sounds good.
thanks
-bb
Re: Step by step toon polishing please?
just bit the bullet and bought the unigrit from Meguiars and m105,
bad thing is I wont get it for this weekend.
-bb
bad thing is I wont get it for this weekend.
-bb
Re: Step by step toon polishing please?
Polished mine 3 years ago, stripped the Sharkhide off last week and touched them up. I orginally used a standard 7" right angle buffer, was happy with the finish except for the swirl marks. This time I bought a Cyclo polisher, really put a nice swirl free finish on them. Re-Sharkhided and should be good for 3 more years!!!
As far as polish, tried probably 6-8 different brands, just make sure and use a good cutting polish to start with then a finishing polish.
As far as polish, tried probably 6-8 different brands, just make sure and use a good cutting polish to start with then a finishing polish.
2007 Playcraft Powertoon 2400
I'd rather be lost at the lake than found at home.
I'd rather be lost at the lake than found at home.
Re: Step by step toon polishing please?
Hey all,
I just came accross Toms (busatom) post and I hope It's not too late to offer a hand.
First and foremost, I want to thank woolznaz with the BEST advice of all. If you're not getting the results you expected with a product, just call the manufacturer. Not just my products, but any product. Just to make it easy for my customers, I have my phone number on my website, on the instruction sheets and on all my labels. I love to help folks with questions and invite them to call 24/7.
It sounds like Tom has the basics down, but he just needs to tweak his technique a bit.
The steps I'll try to lay down here are the basics I use when polishing a boat with my Sharkhide products. These steps are for smooth clean aluminum. I'f you're dealing with corrosion, pitting or deep scratches, that's a different thing all together. Those problems need to be addressed with totaly different methods.
Use a "high quality" (Makita, Dewalt, Milwaukee etc.) VARIABLE SPEED buffer with a Lambs wool pad. You'll use the same pad for the entire job. No need to wash or clean the pad, just turn the buffer on it's back and touch off the pad with a screw driver if you notice it not cutting as fast as it was.
#1) First, I clean the boat with my Aluminum Cleaner to remove any streaks, stains and water lines. This also seems to allow the polish to cut quicker.
#2) I allways work in 2" X 12" to 16" wide horizontal sections. Start at the top of the pontoon and work down. Then move over and repeat that patern all the way down the side of the boat.
#3) Apply a very small ammount of the Metal polish to the boat and spread it around with the buffer pad into about a 2" high X 12" to 16" wide area.
#4 Then at a VERY slow rpm, and with lots of down pressure, slowly work back and fourth using just the OUTER 1/4 edge of the pad. Youl notice that black grime show up right away.
Keep working in a slow back and fourth motion untill the black grime begins to dissapear. It will begin to thicken and form a slight ridge at the base of your work area. Once this begins, just slowly follow it down untill it's gone. This is your "first cut".
#5) Now repeat step #4 and after this pass you should be seeing your reflection. The more time you spend on this step, the better the final shine.
#6) Now that the polishing is done, you may notice some dark blotchy spots.I blend all those sections together by applying a small ammount of Metal polish and instead of 12" wide passes, I'll sweep back and fourth about two or three feet.
These are just the basic "starting points" I use when when I polish. No two jobs I've ever done were the same. If I see it's not working as fast as it should, I'll change things like buffer speed, pressure, angle of pad or ammount of polish untill I find that "perfect technique" for that particular job.
I hope this helps with your project. And as I said before, please feel free to give me a ring any time at all. I'll be more than happy to go over the details of your project with you.
Best of luck to you,
Clint
Flatwater Inc
618-624-4091
Re: Step by step toon polishing please?
Sounds great. Let us know how it works out for you when you get the stuff.blackberg wrote:just bit the bullet and bought the unigrit from Meguiars and m105,
bad thing is I wont get it for this weekend.
-bb
By the way, I have good luck finding my 2000 grit paper at Napa. Sometimes Advance auto has it, but not every time.
"Nauti Weasel"
2005 Beachcomber Islander 26
2005 Beachcomber Islander 26